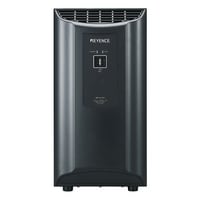
Image Dimension Measurement System
IM-6000 series
Recommended Replaceable Products: Controller - IM-8000
Contact Us: 1-800-103-0090 Enquiry form
Controller IM-6700

*Please note that accessories depicted in the image are for illustrative purposes only and may not be included with the product.
Specifications
Model | IM-6700 | |||
Type | Controller | |||
Image sensor | 1" 6.6 mega pixel monochrome CMOS | |||
Display | 10. 4" LCD monitor (XGA: 1024 × 768) | |||
Receiver lens | Double telecentric lens | |||
Image measurement | Field of view | Wide field: ø100 × L200 mm, High precision: 25 × L125 mm | ||
Minimum display unit | 0.1 µm | |||
Repeatability | W/o stage movement | Wide field: ±1 µm, High precision: ±0. 5 µm | ||
With stage movement | Wide field: ±2 µm, High precision: ±1. 5 µm | |||
Measurement accuracy (±2σ) | W/o binding | Wide field: ±5 µm*1, High precision: ±2 µm*2 | ||
With binding | Wide field: ±(7 + 0. 02 L) µm*3, High precision: ±(4 + 0. 02 L) µm*4 | |||
External remote input | Non-voltage input (with and without contact) | |||
External output | OK/NG/FAIL/MEAS. | Relay output/rated load: 24 VDC, 0. 5 A/ON resistance | ||
Interface | LAN | RJ-45 (10BASE-T/100BASE-TX/1000BASE-T) | ||
USB 2.0 series A | 6 ports (front: 2, rear: 4) | |||
Record | Hard disk drive | 250 GB | ||
Illumination system | Transparent | Telecentric transparent illumination | ||
Ring | Four division, multi-angle illumination (electric) | |||
X stage | Moving range | 100 mm (electric) | ||
Z stage | 30 mm (electric) | |||
Withstand load | 2 kg | |||
Measurement points | 99 points max. (99 × 9 points possible when the function for consolidating measurement settings is used) | |||
Pattern search (profi le tracking function) | XYθ (with 360° rotary position compensation) | |||
Pattern registration | 1000 patterns or more*5 | |||
Measurement time | 2 seconds*6 | |||
Basic measurement function | Distance measurement | 8 types (point-point/line-point/line-line/circle-point/circle-line/circle-circle/circle/arc) | ||
Angle measurement | Provided | |||
Calculation | ||||
Virtual line function | Point | Middle point/intersection | ||
Conjunction edge | Line conjunction/circular conjunction | |||
Line | 6 types (midline/perpendicular line/parallel lines/tangent line/line passing through a point/approximate line) | |||
Circle | Middle circle/approximate circle/auxiliary circle/inscribed and circumscribed circle | |||
Application tool | Pitch measurement | Line/circumference | ||
Pitch angle | ||||
Width measurement | Edge width | |||
Thickness measurement | Thickness measurement/gap measurement between inner and outer diameters | |||
Special tool | Rounded corner/curved surface/oval/reticle/point position/perimeter/area/screw/automatic measurement | |||
GD&T | Shape tolerance | Straightness/circularity/profile | ||
Orientation tolerance | Squareness/parallelism | |||
Position tolerance | Point position/concentricity | |||
Element tool | Point | Point (on a line or arc)/maximum and minimum (rectangle, circle, arc) | ||
Line | Line/centre line/peak line | |||
Circle | Circle/arc/peak circle/peak arc | |||
Profi le extraction | Provided | |||
Special tool | Automatic generation/gauge line | |||
Manual measurement | Provided | |||
Coordinate system confi guration | ||||
Batch confi guration of tolerance | ||||
Element list editing | ||||
Measurement setting data binding function | ||||
DXF export function | ||||
Automatic measurement function | ||||
Q-DAS data save function | ||||
Measurement settings support functions | Provided*7 | |||
Power supply | Power voltage | 100 to 240 VAC 50/60 Hz | ||
Power consumption | 310 VA max. | |||
Environmental resistance | Ambient temperature | +10 to +35 °C | ||
Relative humidity | 20 to 80 % RH (No condensation) | |||
Weight | Approx. 8 kg | |||
*1 In the range of ø80 mm from the centre of the stage within the operating ambient temperature range of +23°C ±1.0°C at the focused focal point position | ||||


